


» Print Literature, Flyers, Brochures » Promotional Items / Printers » Labs (Water/Dust Tests, etc.)
All Resources (alphabetical) » Earth Monitoring & Information » Meteor and Fireball Tracking » Government & Industry Documents » Weather Control & Manipulation » Labs (Water/Dust Tests, etc.) » Print Literature, Flyers, Brochures » Personal Education & Research » Promotional Items / Printers » Zip/Postal Codes, Area Codes
|
How-To Timelapse This section contains information about creating timelapse photography If you would like to see a resource included here, please contact us. On This Page Time Lapse Using Your Canon PowerShot Camera rtRenameFiles - Utility to Rename Files in Bulk Joining Your JPG Files Into a Movie Using mencoder to add captions to video All Subtitle Options for mencoder DOS Script for Joining JPGs Into an AVI Solving Issues with GB Timelapse
Using Your iPad and iPhoneDid you know that your iPad and iPhone (version 5 and above) enables you to quickly and easily create timelapse photography? This short video shows you how. Time Lapse Using Your Canon PowerShot CameraThis sections helps you use your Canon PowerShot series camera to capture stunning timelapse. A similar verson of this article appears here. People have contacted me about doing timelapse photography, so I'm going to post this article and expand it over time with details about how this is done. Available Timelapse MethodsIn short, I'm using 2 methods:
CHDK is a good choice because you don't need a computer dedicated to the camera. It does take more time to set up, but once you do, it's very stable and completely portable, plus (as a bonus) it adds many more features to your camera. GB Timelapse software has a decent user interface, but my major problem with it is this: If you have your computer doing other work, GB Timelapse may crash often (in our experience), which is quite frustrating when doing timelapse. On the other hand, I have used it on a dedicate XP machine that does nothing else but timelapse and it works for weeks without a single glitch. So if you can dedicate a machine to timelapse, this may work well for you. Of course, GBTimelapse much simpler than using CHDK, but CHDK is not really hard. You just have to take the time to read the instructions. Also, with GB Timelapse, make sure you have the right operating system for your camera. Some cameras require XP, for example. LinksTo learn about the CHDK method, visit the official CHDK Wiki. The CHDK documentation can be hard to follow, so I will try to write more organized and simplified instructions below. To learn about GB Timelapse, visit the official GB Timelapse webpage. Using CHDKThis process is a little detailed, but it's not difficult as long as you follow the instructions. The hardest part is just finding the documentation you need and finding an Intervalometer script to install [i]within[/i] the CHDK operating system. Following are the basic steps to using CHDK:
Finding an Intervalometer Script that Works with Your CameraBelow is a list of Intervalometer scripts. This is the one I'm using on my Canon A650IS. It works fine even though the documentation does not mention this particular model. I am using the original version of the script, as shown here: rem Author - Keoeeit This is another script. I haven't tried using it, but if someone has, please let us know how it works: rtRenameFiles - Utility to Rename Files in BulkWhen you are ready to convert your thousands of timelapse images into a movie, it's necessary to have your images named properly. For example, your timelapse software (or camera) may begin numbering images at some value other than zero. Then, it may flip - like an odometer - back to zero after it runs out of numbers. This situation can cause ffmpeg, MEncoder, and other processors to process the images in the wrong order. So occasionally, you may need to rename all of your images for a particular timelapse session so they sort upward alphabetically according to the time they were taken. I wrote a file-renaming utility for just this reason. It's free, so feel free to download it here: UsageTo rename all of the files in the current directory so they sort properly by ffmpeg and MEncoder, just rename them according to their modification date. Make sure that the year is first, then the month, then the day, etc. so the final file names looks like this: 2010-06-28_18-59-59.jpg Once you download the utility, you can issue this command to rename all of the JPG files in the current directory in this format: rtrenamefiles -file-mask *.jpg If you prefer to have the files named sequentially from 1 to 10000 (or whatever is your total number of images), follow the above command with this command: rtrenamefiles -file-mask *.jpg -file-name-template {SerialNum}.{FileExt} Now your files will be renamed sequentially (starting at 1) according to the date they were modified. It's best to use the last-modified date because this is the date the files were last written to and usually reflects the actual date the picture was taken. The creation date can change if the image is simply copied from one location to another. If you have any problems, feel free to contact me. Good luck with your timelapse movies. Be sure to post them here on this forum. Joining Your JPG Files Into a MovieOnce you have all of your timelapse images ready to merge into a movie, it's easy to create a movie from it. Just install MPlayer on your computer. When you do this, a command line utility called MEncoder will automatically be installed. This utility will enable you to easily encode a series of JPG files into a movie. You can download MPlayer from here: http://www.mplayerhq.hu/MPlayer/releases/MPlayer-1.0rc3.tar.bz2 If this links goes out of date, then browse to this page and find the download. http://www.mplayerhq.hu/design7/news.html Then, in the directory containing your images, issue this command: mencoder "mf://*.jpg" -o movie.avi -ovc lavc -lavcopts vcodec=mjpeg Change "movie.avi" to the name of the file you want to create. When the command is finished, you should have an AVI file that will play with any decent media player. You can upload this movie directly to a video sharing site, like YouTube. They will automatically convert it to a Flash video for you. Let me know if you have any questions, and remember to post your videos of chemtrails here on this forum. Update: April 25, 2011I just wrote a utility that makes it easy to join JPG files into a video in multiple directories. Here is a link: http://orbisvitae.com/software/rtjpg2video/ Using mencoder to add captions to videoI have been using mencoder to add captions to timelapse video that I create from a series of photos. I perform these 2 functions in a single step using mencoder. Following are some samples. Basic Title for VideoThis puts a title on the screen for the first few seconds of the video. mencoder "mf://*.jpg" Argument Explanations-font c:\windows\fonts\verdana.ttf The -font argument needs to be provided with the path to a font file. In this example, I used the Verdana font located in my Windows\fonts folder. -sub title.srt The -sub argument specifies an "srt" file that exists in the current directory. This file is called a "SubRip Title" file and normally has the extension "srt". The text for the title(s) is located in this file. The "srt" file has the following format: 1 The "1" and "2 are simply serial numbers indicating the title "number". The second line represents the time the title starts and ends in hours:minutes:seconds. The "seconds" field contains 3 decimal places after the comma. Note that the comma is a decimal delimiter used in France (the origin of the "srt" file format). Americans should think of this as a decimal point (because that's what it represents). The third line is the actual text that you want to have displayed. This text is limited to a maximum of 2 lines in length. So, if you wanted to have a single title displayed throughout the length of your video, your "srt" file may look like this: 1 Note that the start time is the very beginning of the video and the end time is much longer than the video. This ensures the title is displayed all the way through the video. -subalign 2 This tells mencoder to align the title with the bottom of the video. -subfont-autoscale 0 This tells mencoder to interpret the value of the -subfont-text-scale argument as "points". -subfont-text-scale 16 This tells mencoder to make the font size of the title 16 points. In order for this argument to be interpreted as a "point" size, the argument -subfont-autoscale must be set to 0 (zero). All Subtitle Options for mencoder-sub <subtitlefile1,subtitlefile2,...> -sub-bg-alpha <0-255> -sub-bg-color <0-255> -sub-demuxer <[+]name> (-subfile only) (BETA CODE) -sub-fuzziness <mode> Adjust matching fuzziness when searching for subtitles: -sub-no-text-pp -subalign <0-2> -subcc -subcp <codepage> (iconv only) EXAMPLES: -subcp enca:<language>:<fallback codepage> (ENCA only) EXAMPLES: -subdelay <sec> -subfile <filename> (BETA CODE) -subfont <path to font (FreeType), font pattern (Fontconfig)> (FreeType -subfont-autoscale <0-3> (FreeType only) The mode can be: 0 no autoscale -subfont-blur <0-8> (FreeType only) -subfont-encoding <value> (FreeType only) -subfont-osd-scale <0-100> (FreeType only) -subfont-outline <0-8> (FreeType only) -subfont-text-scale <0-100> (FreeType only) -subfps <rate> -subpos <0-100> (useful with -vf expand) -subwidth <10-100> Source: www.mplayerhq.hu/DOCS/man/en/mplayer.1.txt DOS Script for Joining JPGs in Multiple Subdirectories Into an AVIThis is a small DOS script that I wrote that turns JPGs from multiple subdirectories into a single AVI (movie). This script requires that mencoder be installed. When I capture a series of JPG pictures on my Canon A650 camera using CHDK with an intervalometer script, they are stored on the SD card like this: 123CANON As you can see above, pictures are stored in each subsequent *CANON directory. The pics are spread out across many directories because this camera formats the SD card in DOS (12-bit) format which can only contain a limited number of files (JPGs) per directory. When I copy the SD card contents to my hard drive, my file system setup looks like this: C:\Timelapse Now, the problem is this: In order to turn all these pictures into a movie, you have to put them into a single directory and have them named so they sort according to their creation date (actually the "last modified" date is more reliable). I run a custom script from this directory (I call this a "date-root" directory because it is the root directory for a specific date): C:\Timelapse\2010-08-10 and it performs this sequence of events:
I wrote the following script so you can do all these steps with a single command. Just run the script in the date-root directory (like C:\Timelapse\2010-08-10). A movie file called "_movie.avi" will be created in the current directory. This is your final movie with all JPGs joined together. This file can be uploaded directly to YouTube as is. If you make a mistake, you can run the script more than once in the same directory with no ill effects. To use this script, your computer must meet the following requirements:
If you want the movie to have a title, just create a file called "_title.srt" in the date-root directory with the format described in a previous post on this thread. You will also have to make sure the -font argument of mencoder points to a valid font on your computer. To use this batch file, just copy the following text and place it into a file called jpg-to-avi.bat. Make sure the Windows environment variable PATH points to it (see above). :: JPG to AVI by Russ Tanner v 1.00 Solving Issues with GB TimelapseWhen I first purchased GB Timelapse to control one of my Canon timelapse cameras, I was having issues with it disconnecting from the camera, sometimes once a day, sometimes once every 5 minutes. Through MUCH turmoil and experimentation, I found the source of the issues and want to post them here to save you all the time and trouble. USB Extension Cables
I had purchased some nice USB 2.0 repeater cables that can be daisy changed up to 16 feet. This allowed me to put the camera away from the computer (so the computer didn't have to be next to the window). I moved the computer to the window and removed the USB extension cables. 90% of my disconnect problems vanished. The canon remote drivers that GB timelapse uses to communicate with the camera are very finicky about errors in communication via the USB cable. Extra Shielding
Sure enough, this eliminated 9% of the remaining 10% of my disconnect issues, but it would still disconnect a few times a week, which was frustrating if it was in the middle of a great chemtrail capture. Stainless Steel ShieldingFinally, I purchased some high quality braided stainless steel shielding and wrapped the USB cable in it instead of the foil. I then clipped the shielding to the computer case (ground) with an alligator clip. 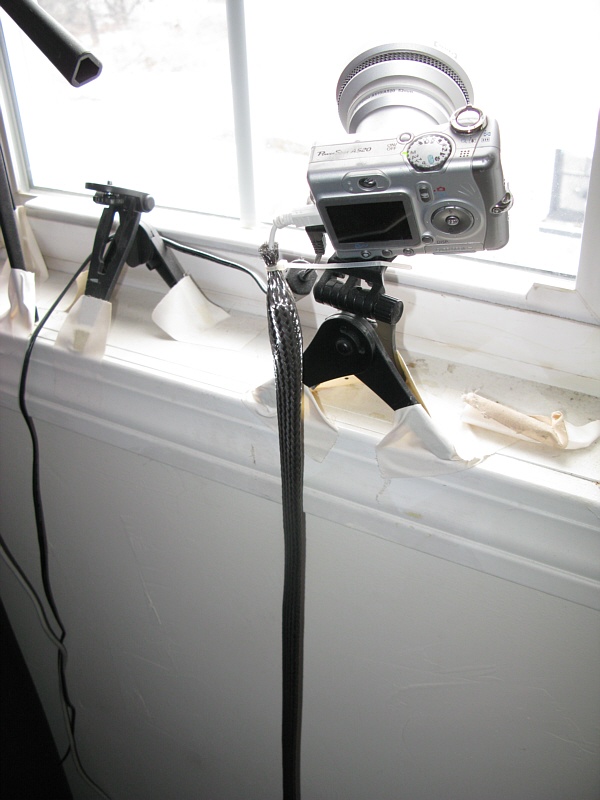
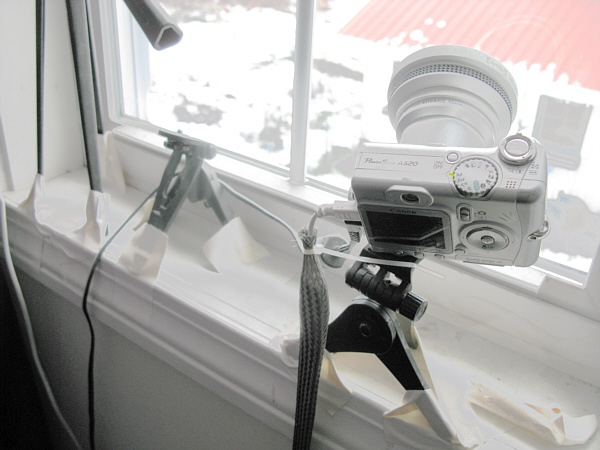
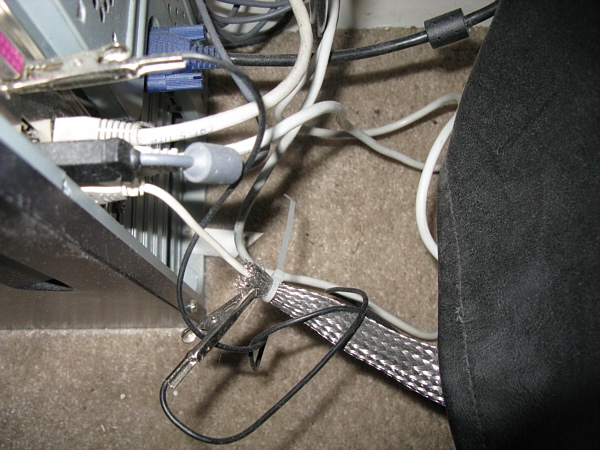 This has eliminated all remaining disconnect issues and I have now run my camera for about 3 months non-stop without a single disconnect. Here is a link to the braiding that I used: I cut it so it actually covers nearly all of the cable. It even covers the noise-reducing metal bead/cylinder at the end of the cable. I then secured it at each end with a nylon cable tie (see photos below). Raising Windows Process PriorityWhen I recently connected a web cam to the same computer for automatically uploading pictures to our server, I once again began having the same disconnect issues with GB Timelapse. I solved this issue by Raising the Process/Thread priority from "Normal" to "Above Normal" for GB Timelapse. I figured perhaps YawCam (the web cam software that I'm using) was stealing just enough CPU time to interfere with the USB communication between the camera and the computer. You can change a thread or process priority by pressing Ctrl-Alt-Delete (as if you want to reset the computer), then go to the Task Manager, then go to the "Processes" tab. Right click on GB Timelapse, then "Priority", then set it to "Above Normal". I haven't had a single disconnect issue since. I hope this saves you a lot of time and trouble. If you have any problems or questions about doing timelapse, please feel free to let me know.
|


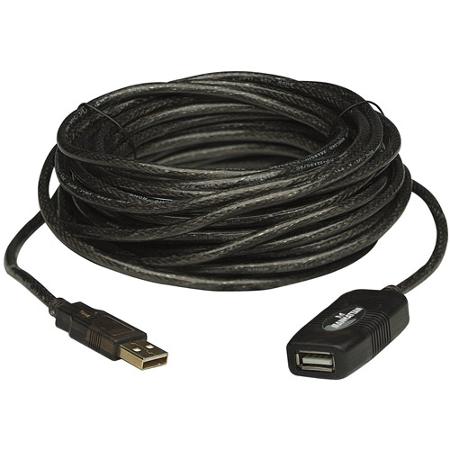 My first problem was that the was camera disconnecting from the computer and from the GB Timelapse program. I discovered that this was the USB extension cables I was using.
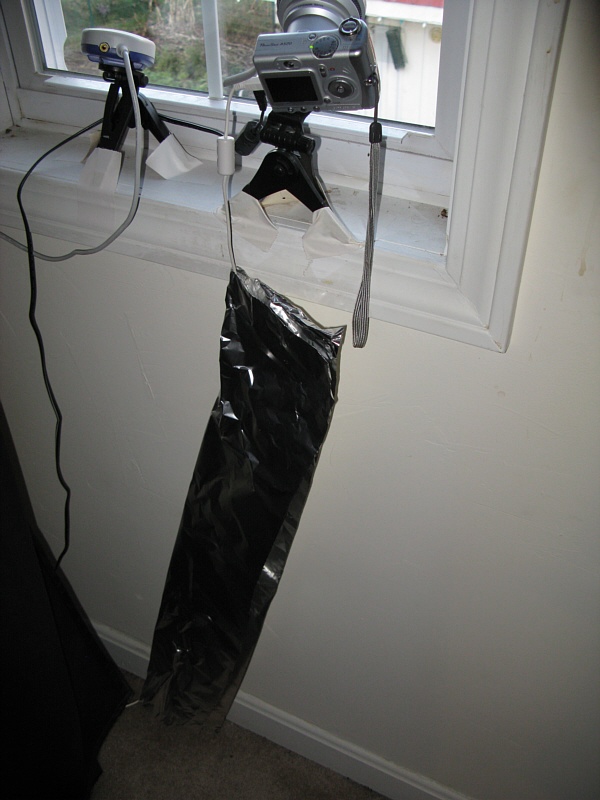 To get rid of the remaining 10% of disconnect issues, I tried putting tin foil around the USB cable and then alligator-clipping the foil to the computer ground (the case) as an experiment (photo left) to see if it was picking up EMF noise.